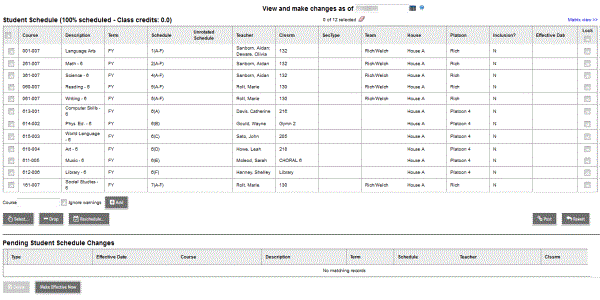
After you add or drop student requests, you might want to reschedule the student. Doing so deletes his or her current schedule and attempts to schedule the student in as many requested courses as possible.
| Note: The system considers any load-type scheduling rules and alternate course requests |
To reschedule students:
- Log on to the School or Build view.
- Click the Student tab.
- Search for and select the student.
- Click the Schedule side-tab. The student’s current schedule appears.
- On the Schedule side-tab, click Workspace. The Workspace displays the student’s schedule and course requests:
- In the List view, the student’s current schedule appears at the top of the page. In the Matrix view, the student’s current schedule appears on the right of the page. Any course section that has not yet been posted appears with an asterisk (*) next to the section number. You can add and drop courses at any time.
- In the List view, the student’s course requests appear at the bottom of the page. In the Matrix view the course requests appear on the left of the page. Any request in red is a course the system could not schedule the student in. You can add and delete course requests.
- To reschedule a
student, verify that all of his or her course requests appear below
Course Requests, and click
Reschedule.
Note: If your school uses dynamic teams and houses, the system asks if you want to keep the student in his or her current house or team.
The system deletes the student’s schedule and attempts to schedule him or her in the requested courses. The system clears any student load conflict reasons, and replaces them with new information.
All courses the system can schedule the student in appear at the top of the page with an asterisk (*) next to the course number. The schedule is not permanent until you click Post.

