Create a Page for each of your classes (for teachers)
As a teacher, you can create a class page for any or all of your own classes. By default, you are automatically the administrator of any Page you create, and the students on the class roster and their parents are the members. To view the Page, you must log off and log back on to Aspen.
After creating a class page, you can include information specific to each course section, such as:
- an area for students to submit assignments online from the Student portal
- an assignment list with due dates
- a group resources area, where students can access and download files such as assignments, reading materials, and class syllabus
See Examples of Pages for ideas.
|
Note: It is also possible for administrators to mass-create Pages for all teachers in a school. Or, teachers can create a group while viewing a roster, and then enable a Page for that group. |
To create a class page for each of your classes:
- Log on to the Staff view.
- Click the My Info tab, Groups side-tab.
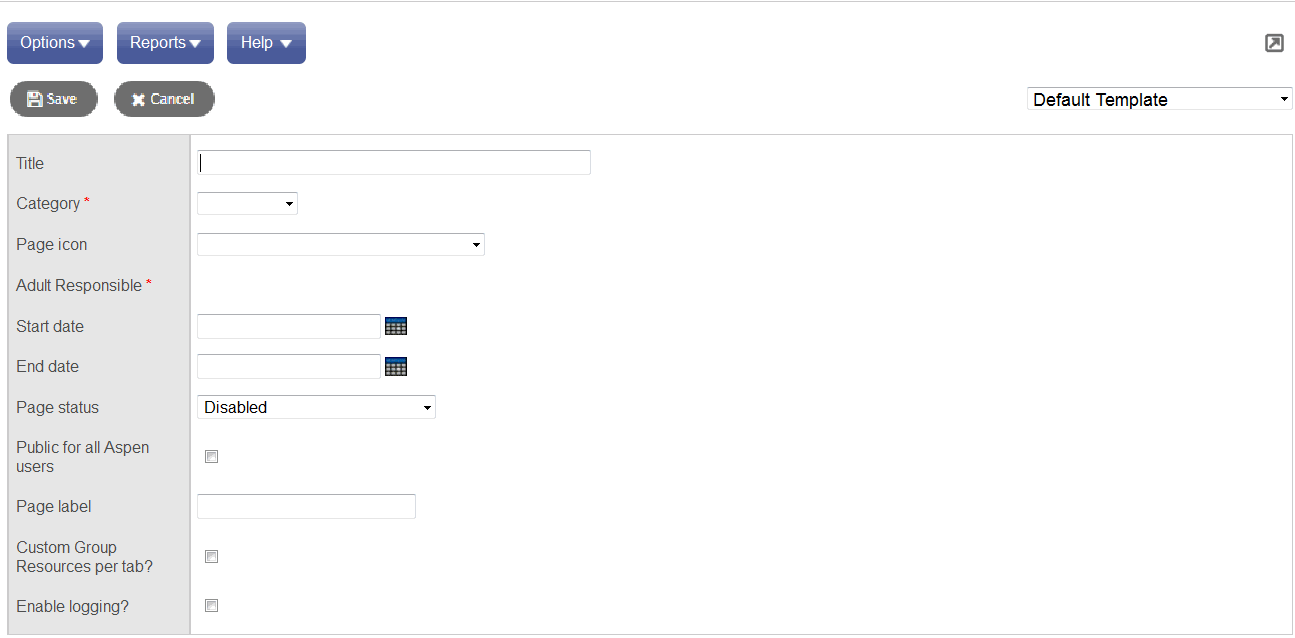
- On the Options menu, click Add. The New Group page appears.

- Use the following table to fill in the fields:
Field Description Title
Type the title of the Page, such as Junior Varsity Lacrosse.
Note: This title is for informational purposes only and doesn’t appear anywhere on the page. It has a 60-character maximum. See Page Label field below.
Category
Click this drop-down to select the type of Page you are creating, such as Academic (this is for sorting purposes only).
Page Icon
Click this drop-down to select an icon name. As soon as you do, an image of the icon appears next to the field.
Note: To view images of all available icons, see Page Icons in online help.
Adult Responsible
The default value and only option is your own name. If you leave this field blank, the system will complete it for you.
Start Date/End Date
Type or click
 to
select a Start Date
and End Date for
the group.
to
select a Start Date
and End Date for
the group.Note: Many groups only last for one academic year. Once a group’s end date passes, its Page no longer appears on the Pages tab.
Page Status
Click this drop-down to select Page enabled for admins only. While it is being worked on, you are the only person who can view the Page.
Note: When your Page is complete, go back into the group details for your class and click this drop-down to select Page enabled for all members.
Public for all Aspen users
Select this checkbox to make it possible for all Aspen users to see this Page. The Page will appear under Public Pages in the Page Directory.
Note: Users can browse public Pages and add them to their Quick Access menu, but this does not mean that they are members of the group. For example, if a school Page is public, users would be able to read a blog that is posted but not create their own entries.
Page Label
Type a label for the Page, such as English 101. This appears on the Pages tab under the icon you select. There is a 25-character maximum.
Note: This field is optional.
- Click Save.
|
Note: To view the Page, you must log off and then log back on to Aspen. |
